Indicator Modes & Compatibility
| Colour |
Mode |
Compatible software |
| Green |
EdgeTX gamepad (universal USB HID) |
Liftoff, Velocidrone, Uncrashed, DRL, TRYP FPV, FPV SkyDive and other gamepad sims; Android (OTG) |
| Orange |
PhoenixRC |
PhoenixRC 5.x / 6.0 (helicopters, fixed-wings, gliders, multirotors) |
| Blue |
RealFlight |
RealFlight series |
| Red |
Settings (Config) |
Vsim web tool (calibration, settings, upgrade) |
| Yellow |
Switching mode; a beep confirms and the new colour is shown |
The controller starts in Settings mode (red) and does not remember the last mode after power-off. Switch to the right mode before using a simulator.
Sound Cues
| Sound | Meaning |
|---|
| Two quick beeps | SWA / SWD switched ON |
| One beep | SWA / SWD switched OFF |
| One longer beep | USB mode switch complete |
| Continuous beeping at power-on | Throttle not pulled down; Mode 1/2 not detected |
| Continuous beeping in use | Input voltage too high (>6 V); use a 5 V supply |
Controls & Layout (Mode 2)
- SWA (CH5) latching button: press once for ON (LED on, two beeps), press again for OFF (LED off, one beep).
- SWB (CH6) / SWC (CH7) 3-position switches.
- SWD (CH8) latching button, same as SWA.
- Switch functions are assigned in the simulator (e.g. arm, flight mode, camera view).
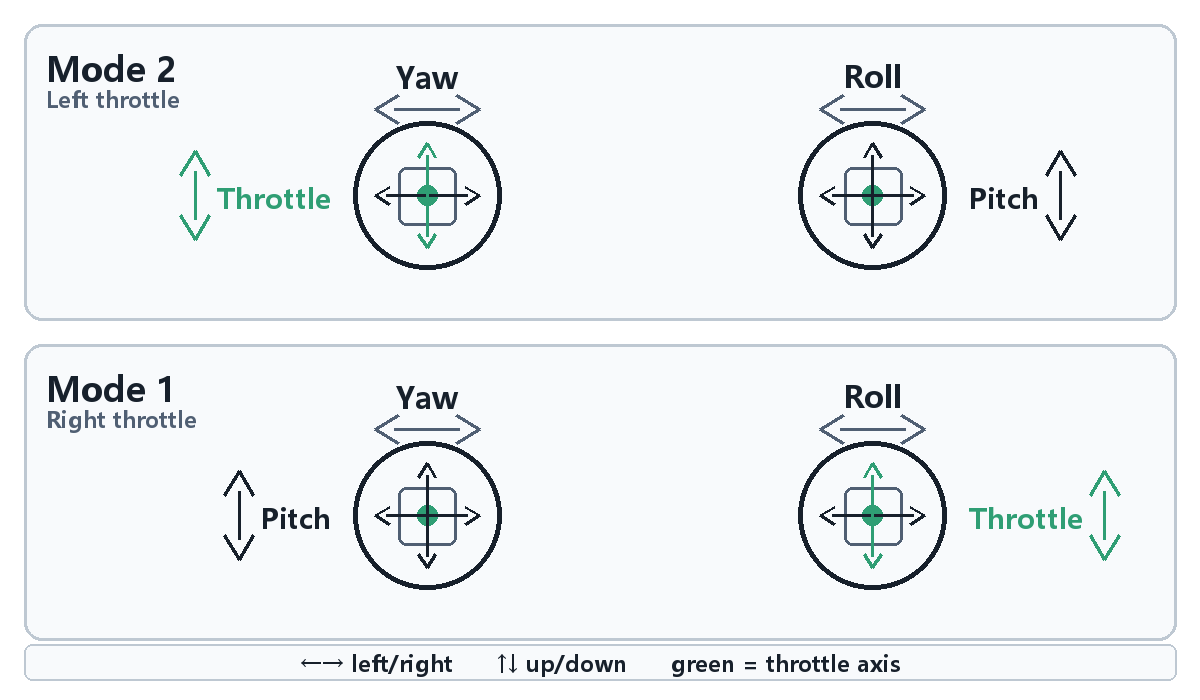
- Left stick: up/down = throttle, left/right = yaw. Right stick: up/down = pitch, left/right = roll.
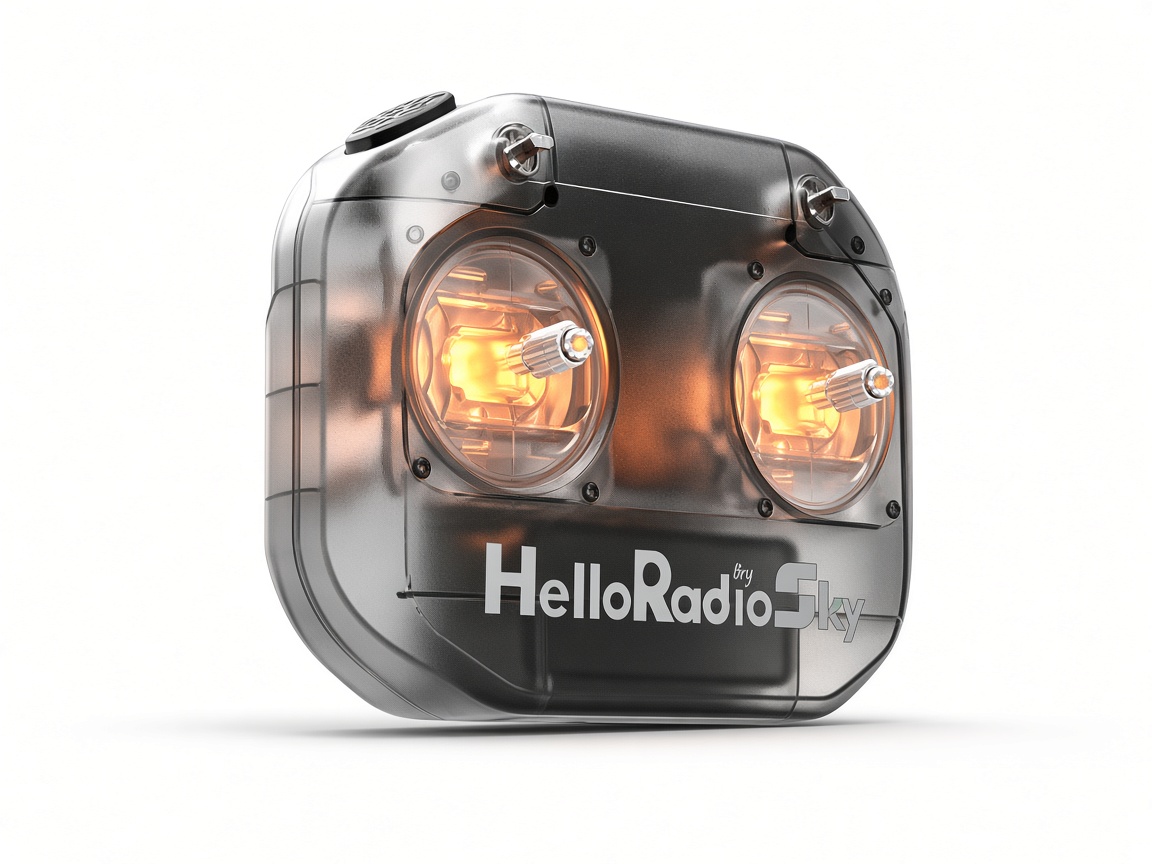
- Status LED: current USB mode. Stick LEDs: effect set in the web tool.
- Hold SWA + SWD for about 3 s: switch USB mode.
- Enter Bootloader: hold SWA+SWD while powering on (RGB red ~4 Hz; faster while flashing). Normal power-on jumps to App when firmware and license are valid.
Control Modes
Auto-detect: pull the throttle stick (the non-centering one) fully down before plugging in; the controller detects Mode 1 / Mode 2 automatically. If both sticks are centred it beeps continuously until you pull the throttle down.
Power-on & Mode Switching
- Pull the throttle down and plug in. The stick LEDs play a rainbow once and the status LED lights up.
- Hold SWA + SWD for about 3 s; the status LED turns yellow.
- The controller reconnects to the computer, beeps and shows the new mode colour.
- Order: green → orange → blue → red → green.
Pressing SWA/SWD to switch mode also toggles their state; press them again to restore.
Connection Methods
PC (Windows / macOS)
- Connect with the USB cable. No driver needed; it appears as “HelloRadioSky Vsim”.
- Not detected: try another USB port, then another data-capable cable.
Mobile / Tablet (Android)
- Use an OTG adapter or dual-ended cable and select green EdgeTX mode.
- Not detected: enable OTG in system settings and reconnect.
Web Configuration Tool
- On a computer, open docs.helloradiosky.com/#vsim in Chrome or Edge.
- Switch the controller to red (Settings mode).
- Click “Connect” and choose “HelloRadioSky Vsim” in the pop-up.
Stick Calibration
Note: Before calibrating, switch the status LED to red (Device Settings mode), then connect with the Vsim web tool.
Use when sticks drift, don’t centre or don’t reach full travel.
- Click “Start”, let the sticks centre, then “Next”.
- Push both sticks fully up/down and left/right to record min/max.
- Click “Save”; calibration is stored on the device.
Device Settings
- Sound: on/off, pitch, volume, test beep.
- Status LED: brightness.
- Stick LEDs: follow sticks / breathing / solid colour (wheel + brightness).
- Output Direction: set each of the 8 channels to normal or reverse.
- Changes apply instantly; “Save” stores them, “Reset” restores the power-on values.
Channel Monitor
“Channels” shows all 8 outputs live for checking sticks and switches.
Firmware Upgrade (two methods)
Success cue: once in upgrade mode, the
RGB LED blinks red continuously (~4 Hz; faster while writing). Use desktop Chrome / Edge and open
docs.helloradiosky.com/#vsim. Calibration and settings are kept.
Method 1 — Enter Boot with keys (recommended)
- Power off the controller (unplug USB).
- Hold SWA + SWD, then plug in USB (keep holding while powering on).
- Confirm the RGB LED keeps blinking red → Bootloader (HID upgrade) is active.
- Open the upgrade page, choose the signed firmware
.bin, and run one-click upgrade.
- After success the device returns to App; you can also use “Disconnect & Jump App”.
Method 2 — Enter upgrade from App web page
- Power on normally into App, then hold SWA + SWD for about 3 s to switch to red (Device Settings) mode.
- Open the web config tool, click “Connect” on the Connection page, and select HelloRadioSky Vsim Config (0483:5750).
- After a successful connect, click “Enter Bootloader” / “Enter upgrade mode”.
- Confirm the RGB LED keeps blinking red → Bootloader is active.
- Then same as Method 1: pick the firmware file in the upgrade panel and upgrade.
Troubleshooting
| Problem | Solution |
|---|
| Continuous beeping after plug-in | Pull the throttle fully down; use standard 5 V USB power |
| Sim does not find the controller | Red is Settings mode; hold SWA+SWD about 3 s to select the right mode |
| PC does not detect it | Change USB port / cable |
| Phone does not detect it | Enable OTG; use green mode; replace the OTG adapter |
| Drift / inaccurate travel | Recalibrate in the web tool |
| Direction reversed | Check Mode 1/2; reverse in “Output Direction” or in the sim |
| Throttle and pitch swapped | Replug with the correct throttle stick pulled down |
| Web page says WebHID unsupported | Use desktop Chrome / Edge over an https address |
| Web tool cannot connect | Make sure the LED is red; close other apps using the device |
| Cannot upgrade / RGB red keeps blinking | ~4 Hz red blink means Bootloader; select HelloRadioSky Vsim Boot (0483:5751), or reboot without holding SWA+SWD to enter App |
If the problem persists, contact customer service with the status LED colour, the software and the operating system you use.
After-Sales Service
This product is covered by the manufacturer’s warranty. Non-human damage within the warranty period is repaired free of charge. Damage from drops, water, disassembly, modification or non-original cables is not covered. For technical support, contact official sales or customer service (WeChat: helloradiosky).
Warranty period: 12 months
Care & Maintenance
- Keep clean and dry; avoid dust and liquids.
- Do not force the sticks or switches.
- Store in a cool, dry place when not in use.
- Do not disassemble or modify; doing so voids the warranty.
Scan for manual / Search Douyin: helloradioRc
helloradiosky.com
Copyright © 2026 HelloRadioSky. All rights reserved. This manual is for product use only; simulator software copyrights belong to their respective developers.